How to make Windows 11 Bootable USB Using Android Phone
Hello, Everybody!
In this article, I’m going to teach you how to make Windows 11 bootable USB using android phone. Problems with booting an operating system may appear out of the blue, and usually, it happens at the most inappropriate moment. On the one hand, you may not have access to another computer at this particular moment, or there might be no bootable disk or USB drive at hand. On the other hand, you don’t feel like visiting your friends who live on the other side of the city… but you do have that portable gadget in your pocket! With an Android smartphone, you can easily restore the operating system of your computer. In a minute, I will teach you in detail how to create a bootable USB drive for Windows 11 with an Android phone. So, let’s begin. What you need to create a bootable drive with your phone.
Requirements
- First of all, a USB drive or memory card of sufficient capacity. I recommend using one with at least 8 GB of free space. It will have to be formatted, so if there is any important data, save it elsewhere. If you are going to use a USB drive, you will also need an On-the-Go (also known as OTG) adapter to connect it to the smartphone.
- Before you proceed. Make sure your phone’s battery is fully charged, as creating the bootable drive is quite a long and power-consuming process.
- Finally, you need an ISO image of the operating system. You can download it from the Microsoft official website. It is necessary to have that image saved in the memory of your phone.
Windows 11 ISO File Download Guide
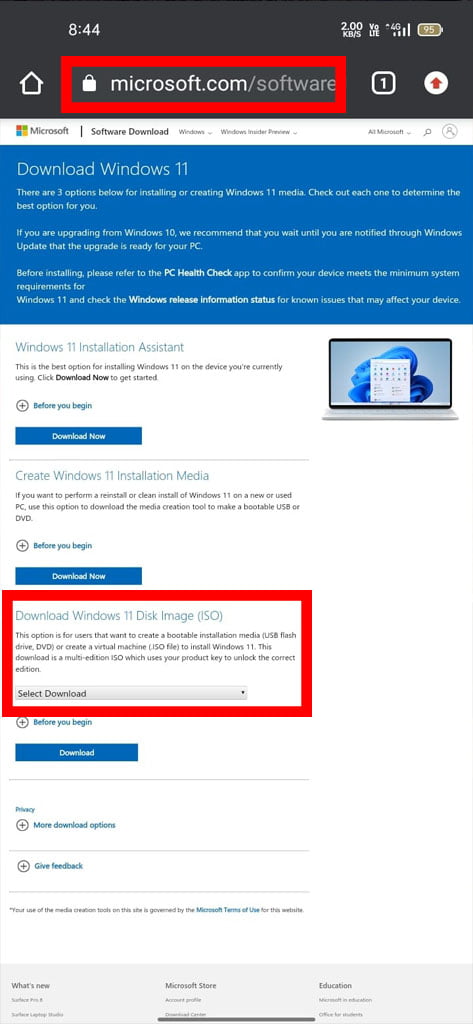
- Open any browser from your Android device, and search for a page where you can download an image of the operating system. I strongly recommend using images from the Official Website only.
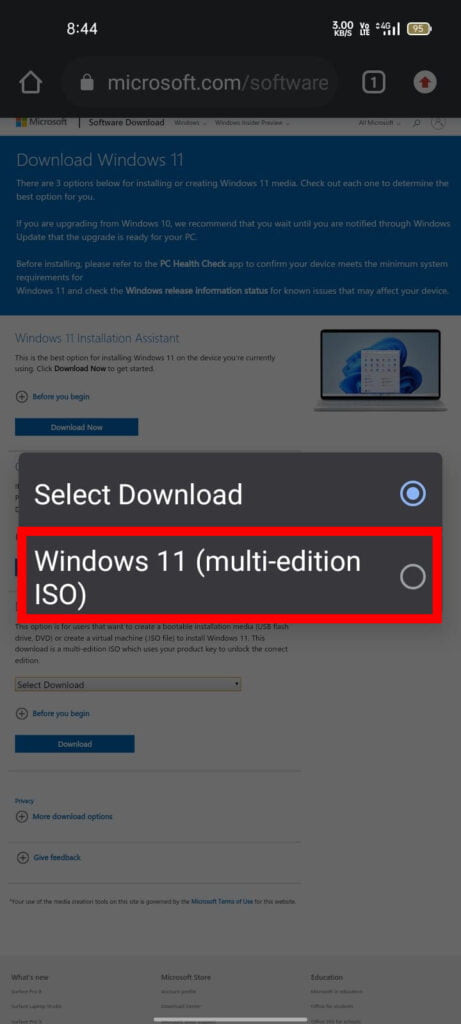
2. Select version, confirm this choice,
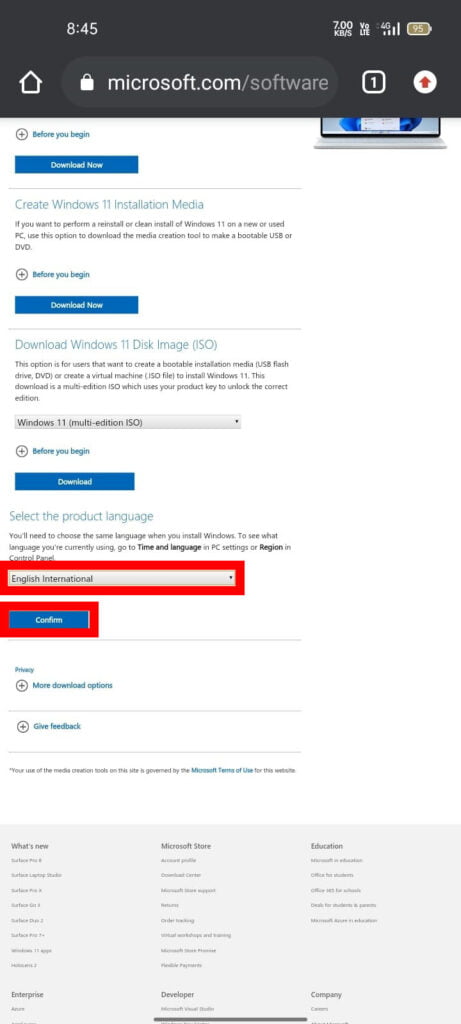
3. Select language, and confirm.
4. After you select the image bitness, 32-bit or 64-bit, the download will start.
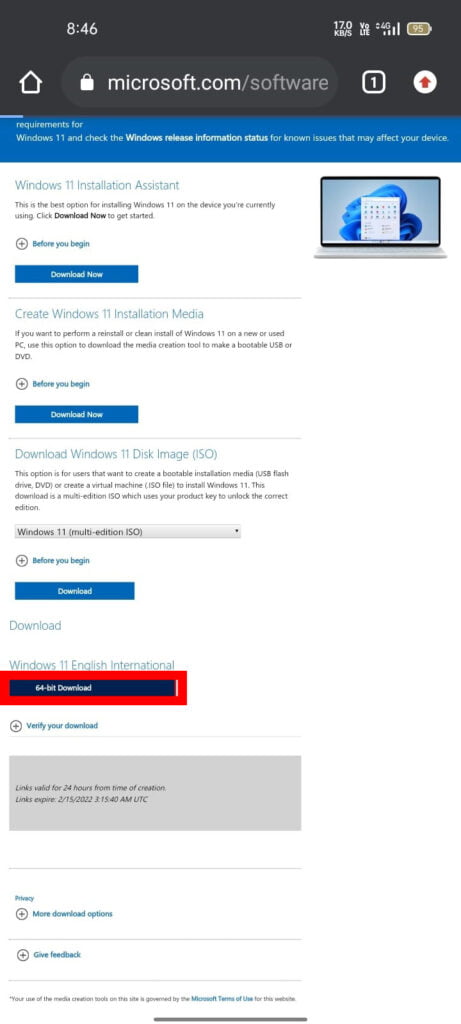
5. Wait until the entire image file is downloaded.
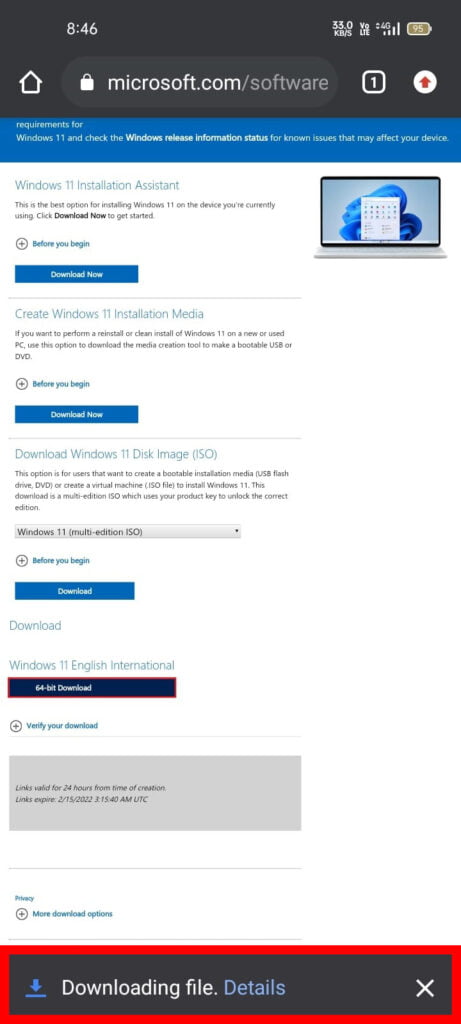
As soon as it’s ready, start creating the bootable drive.
How to write an ISO image to a USB drive from an Android device
In order to write an ISO image of the operating system to the storage device, you need to download a special app – Ventoy – on your phone. This is a simple and free tool available on Play Store, it works without the so-called root access rights, and it can handle ISO files of various sizes. It lets you create a multiboot USB drive or an external USB drive for both UEFI and Legacy.
All right, so let’s start Ventoy and connect the USB drive to your smartphone. You can do it with the help of an OTG adapter, using the proper type required for the type of interface that your device is equipped with: micro USB to USB, or Type C to USB. Consider this peculiarity when selecting an OTG adapter to use.
- When you connect the USB drive you’ll be asked to provide access to the device. Tap OK.
- After that, set the switch to either MBR or GPT.
- Then enable Secure Boot to exclude installation of unlicensed Windows images.
- Now tap Install to add the Ventoy app to your USB drive.
- It is important to remember that the USB drive will be formatted.
- When the installation is complete, it is time to record the image.
- Tap the Copy button, choose the path to the ISO file and add it.
- Wait until the ISO file is copied. It takes quite a long time.
That’s all: the bootable drive is ready to use, and you can connect it to your computer and boot from this drive.
Hopefully, this article was useful.
Leave comments to ask questions.
Thank
2 thoughts on “How to make Windows 11 Bootable USB Using Android Phone”