How to Take Screenshot in Windows 11 Quickly (2022)
Windows 11 is Microsoft’s latest operating system which was launched by Microsoft on 5 October 2021. This operating system works on both device laptops and desktops. You can visit our guide to know How to Install Windows 11. Every OS has the facility to take screenshots whether it is Mac or Windows. there are lots of different ways to take a screenshot in windows 11. In today’s post, I will tell you how to take screenshots in Windows 11 quickly.
Table of Contents
ToggleHow to take screenshot of the full screen in Windows 11
- Press the Prtscn key in the upper keys of the keyboard.
- Open MS Paint.
- Now press ctrl + v key to paste the screenshot in paint.
- After that click on the save button and save it anywhere.
Take a screenshot in Windows 11 using Snipping Tool.
The snipping tool is a new in-built tool in Windows 11. There is no need to download this tool from anywhere. Using the Snipping Tool You can take Full and Half screenshots of windows.
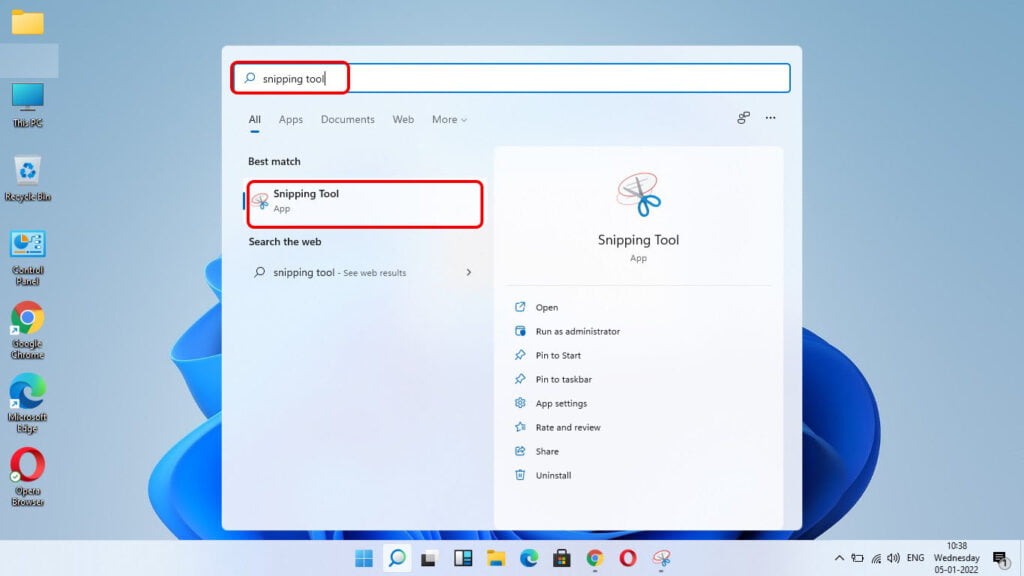
- Click on Start Menu and type in search box “Snipping Tool” open it.
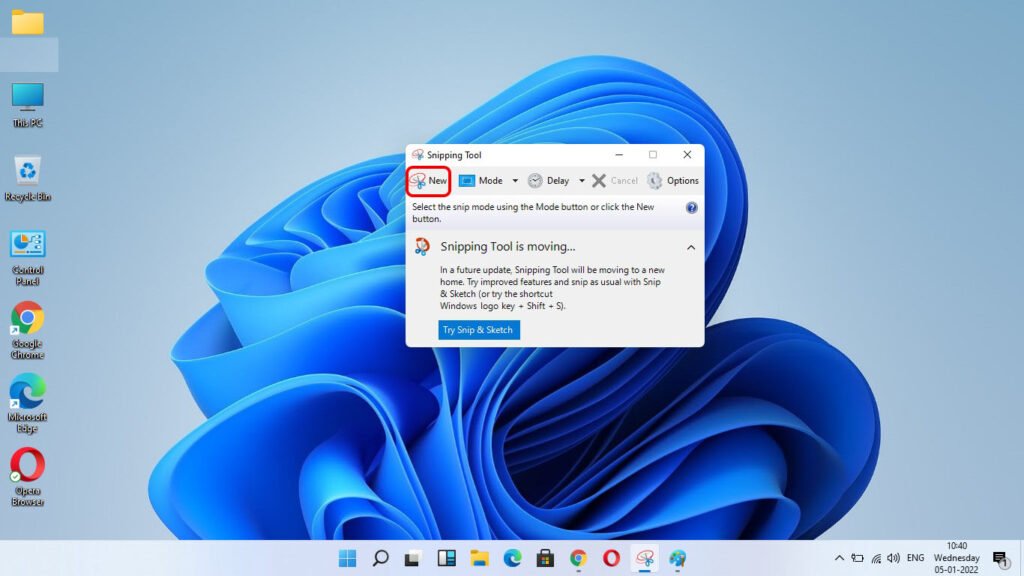
- All the options for taking screenshots will open in front of you.
- Click on New.
- Select your area for taking the screenshot.
- Now, You can also add some Text or you can Draw Line.
- Afer taking the screenshot, Save your File now.


I hope you have learned with the help of this article how to take screenshots in Windows 11. If you have any questions, please let me know in the comment section.


One thought on “How to Take Screenshot in Windows 11 Quickly (2022)”